
Getting Started
Requirements for the Hello Clever Shopify Plugin
Hello Clever is currently available for Shopify merchants with store addresses in Australia.
-
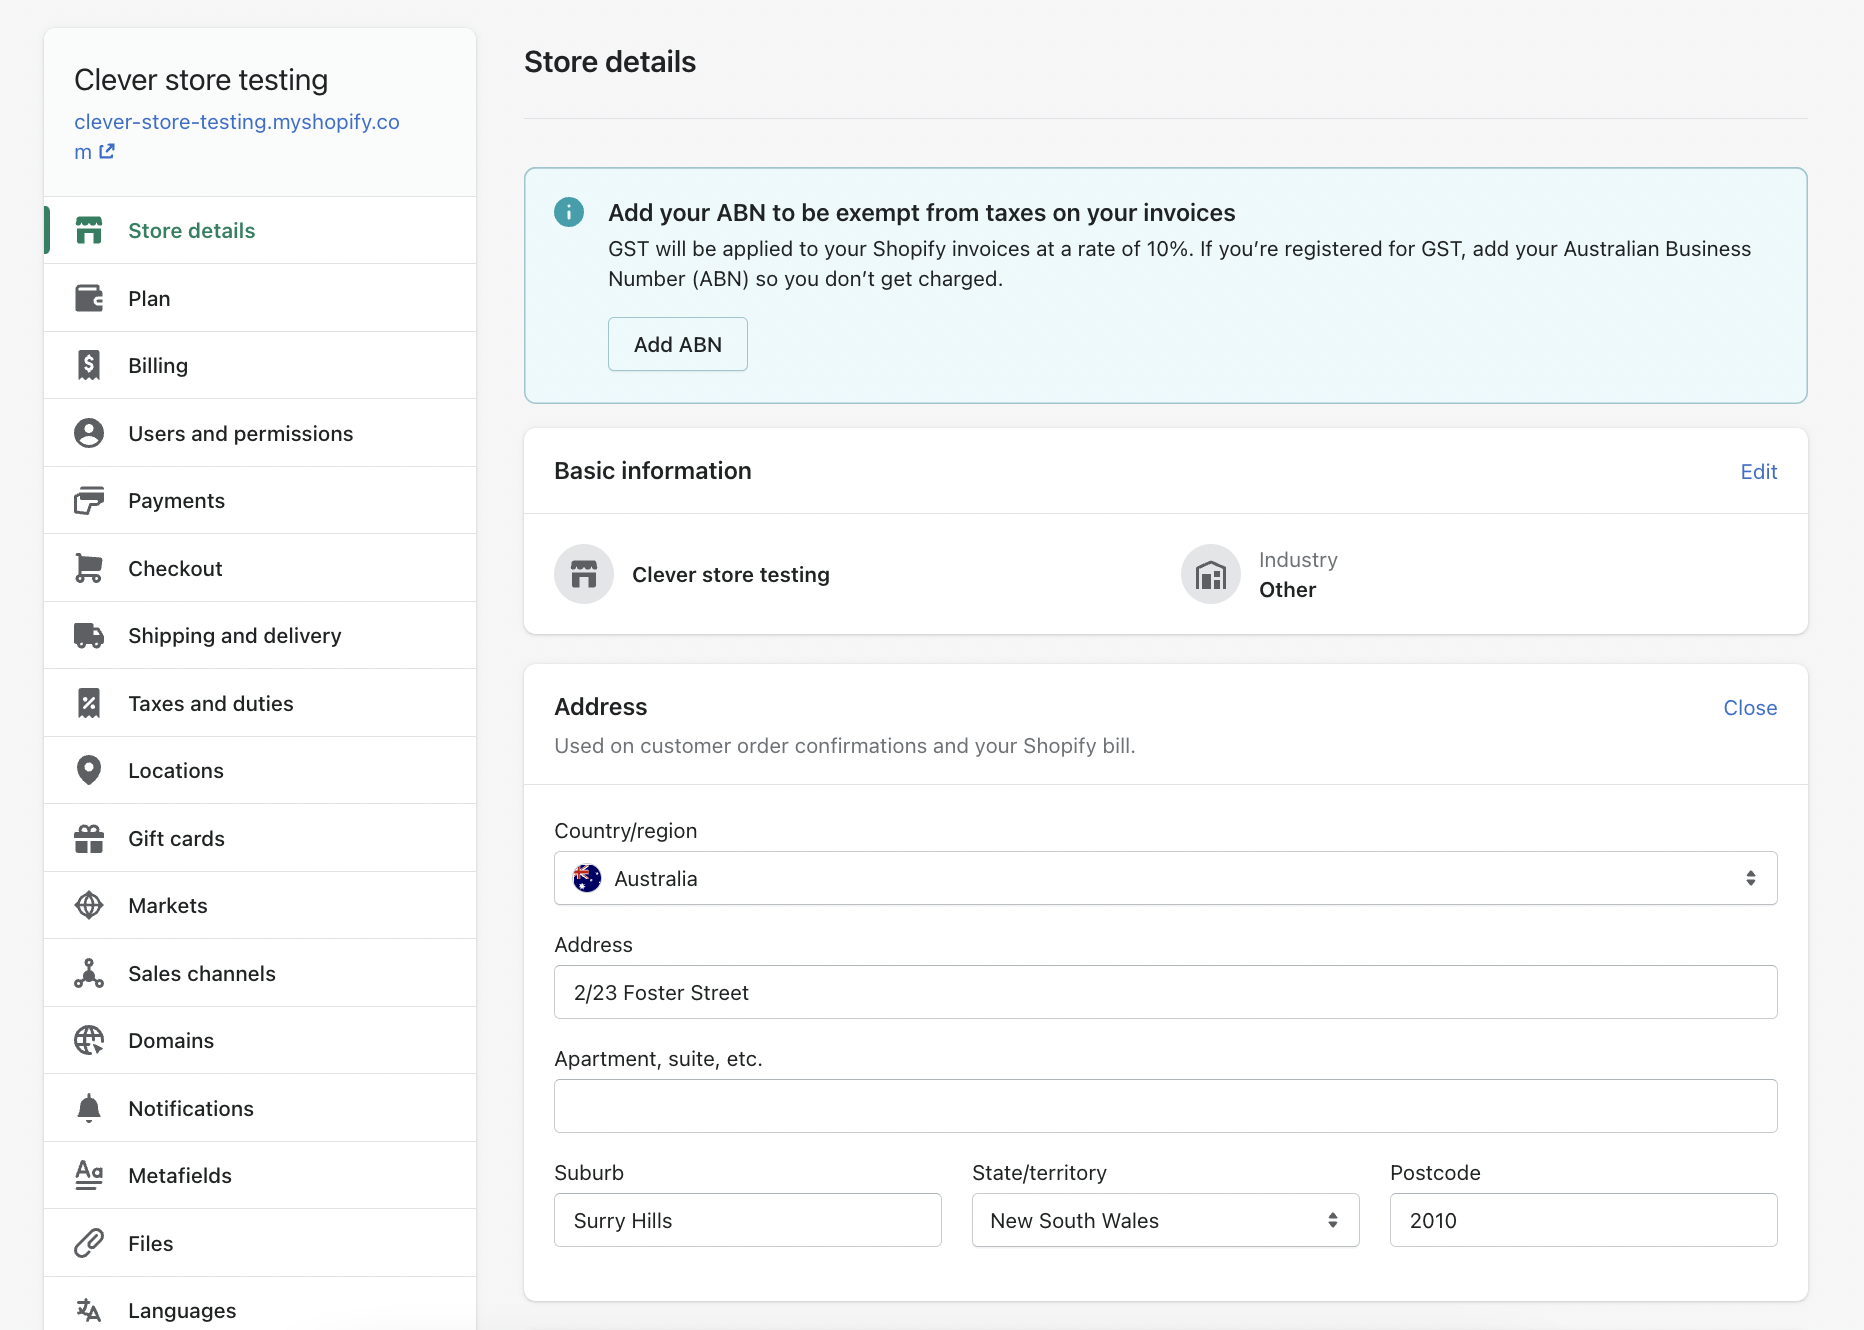
Store Address:
- Ensure that your Shopify store address matches the Hello Clever account region.
- Navigate to: Shopify Admin > Settings > General.
- Under Store Address, the Country must be set to: 🇦🇺 Australia.
-
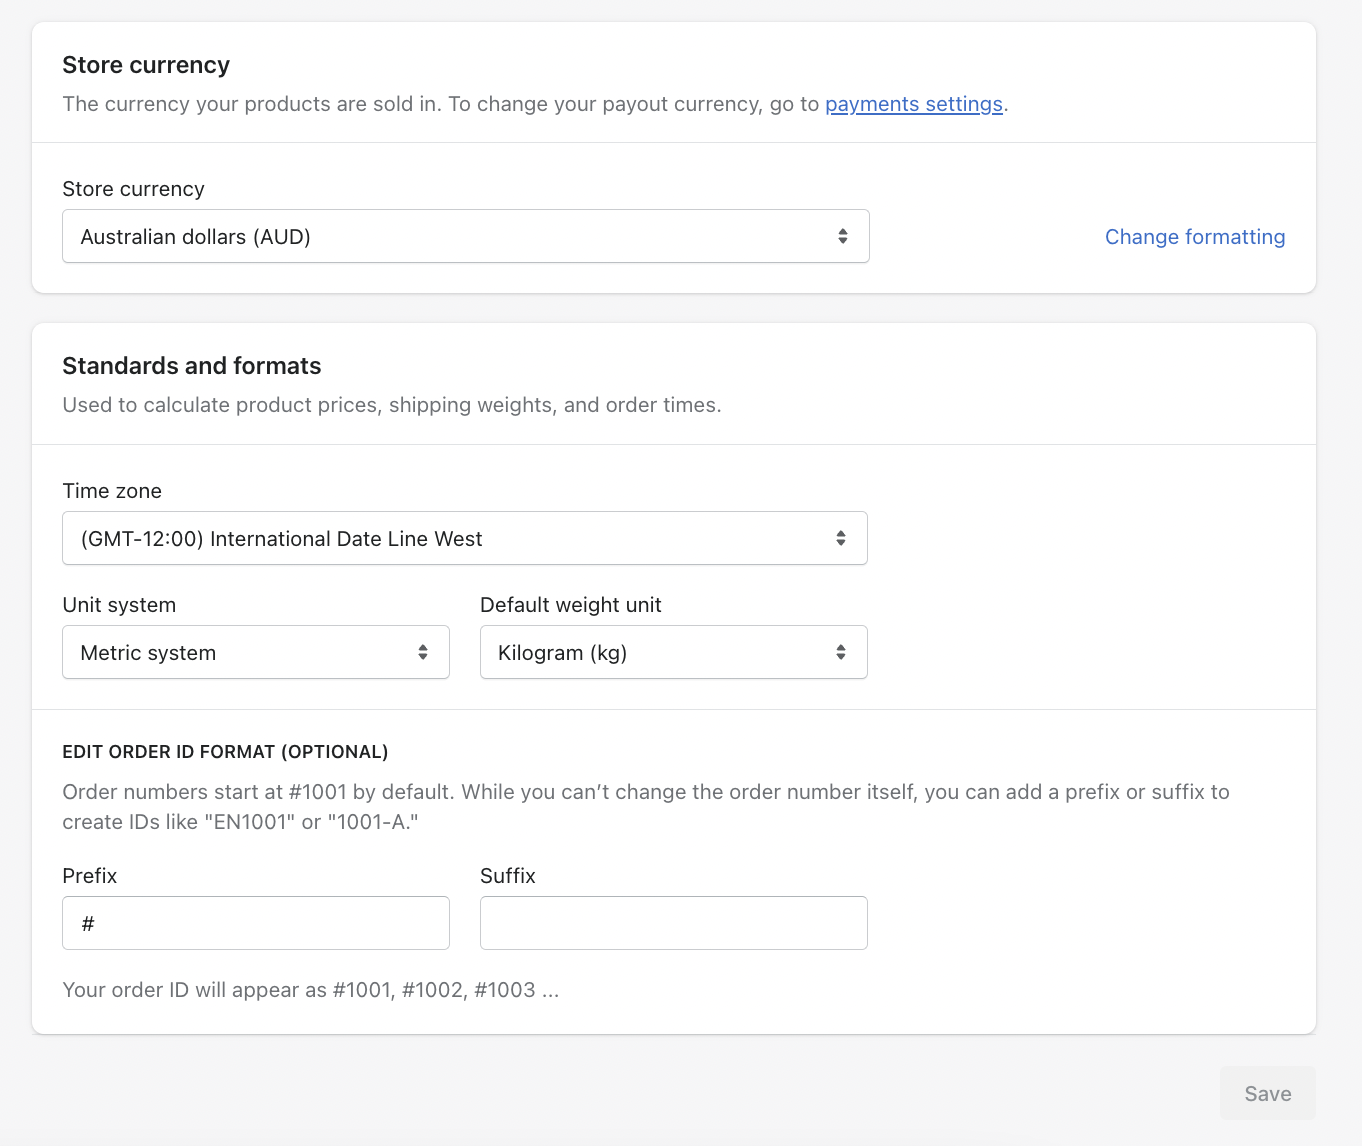
Store Currency:
- Ensure that your Shopify store currency matches the Hello Clever account region. Currently, Hello Clever supports only AUD.
- Navigate to: Shopify Admin > Settings > General.
- Under Standards and formats, set the currency to: 🇦🇺 Australian Dollars (AUD).
Add Payment Option
Adding Hello Clever as a Payment Option at Checkout
Completing the steps below will enable Hello Clever as a payment method on your store's checkout.
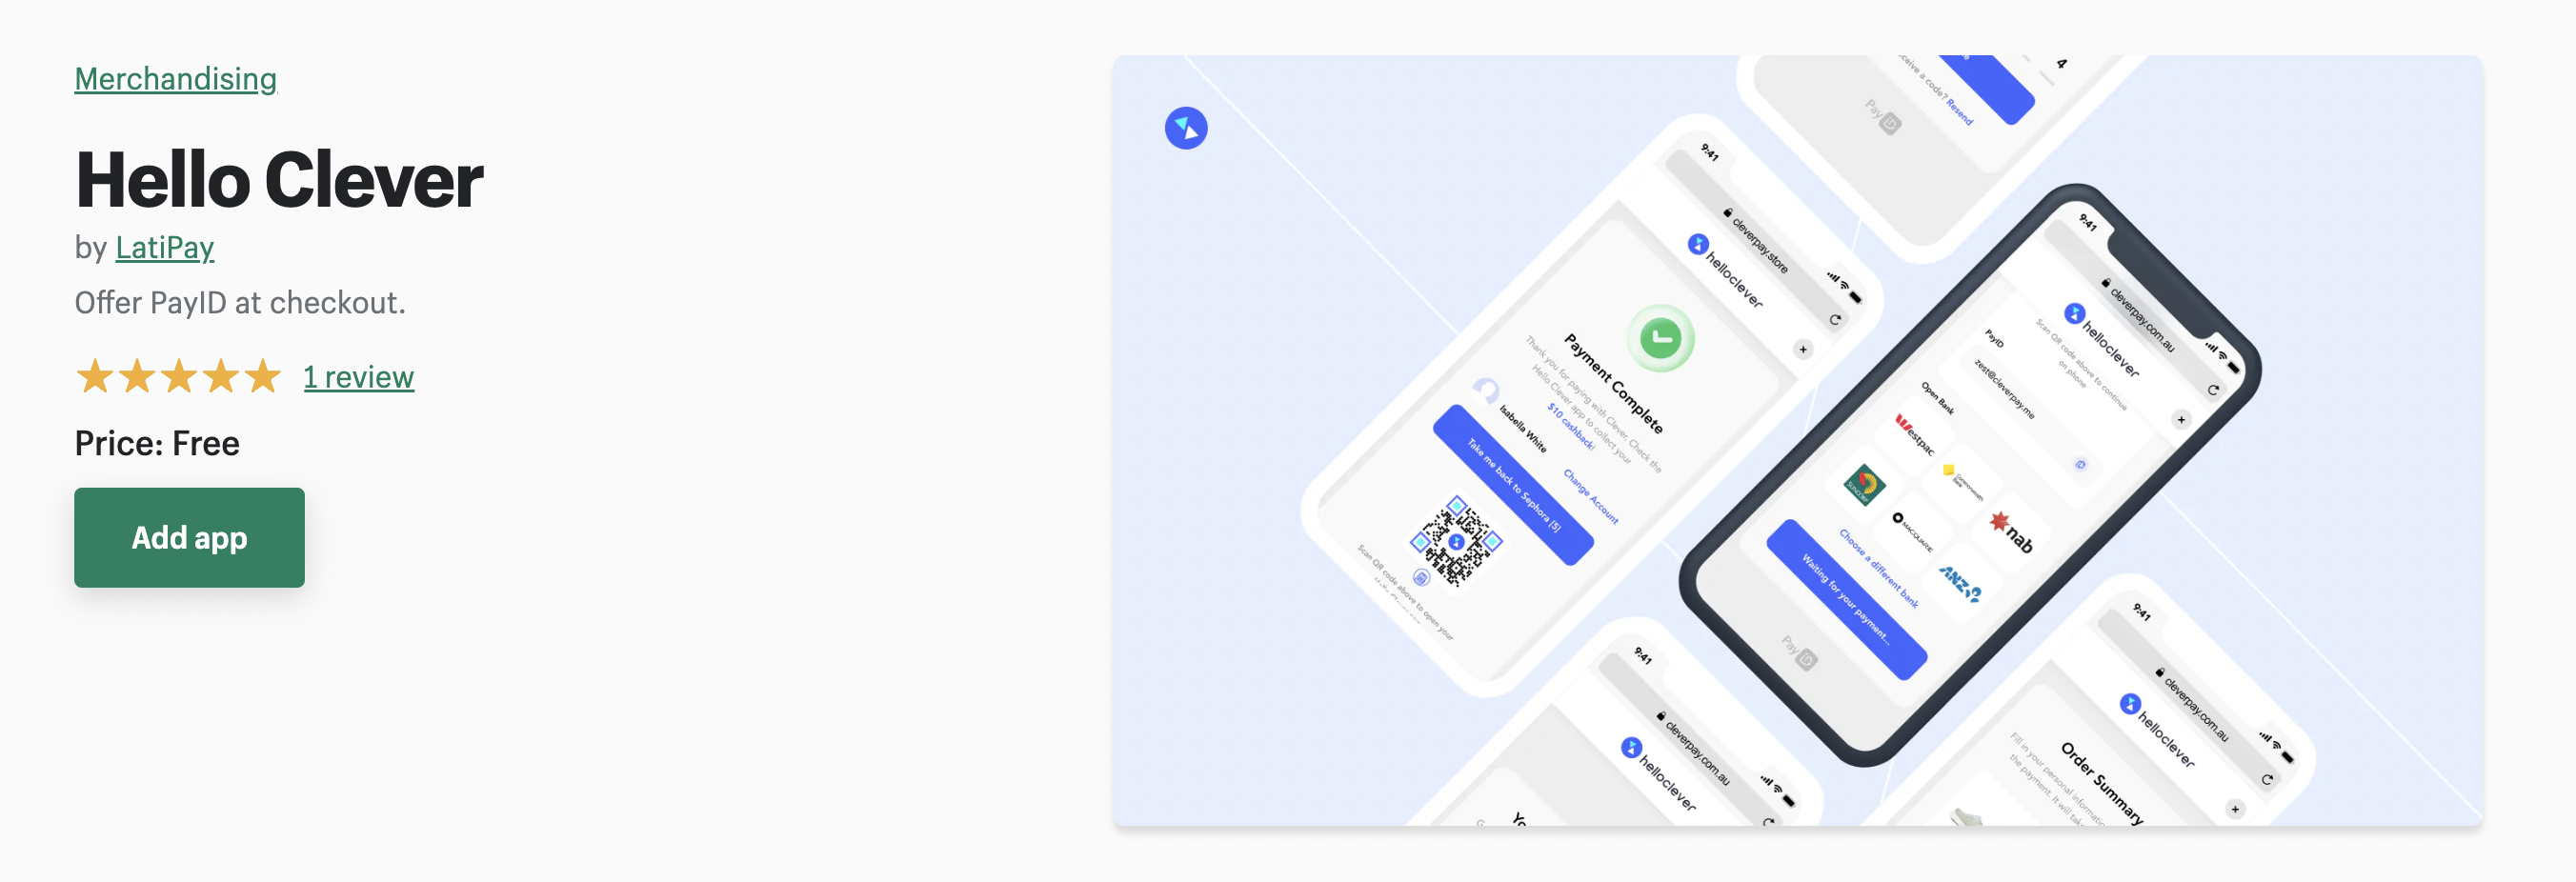
Step 1: Install the Hello Clever Shopify App
-
Visit the Shopify Payment Gateway page to access the Hello Clever Payment Gateway details: https://apps.shopify.com/cleverpay
-
Click on the Add app button.
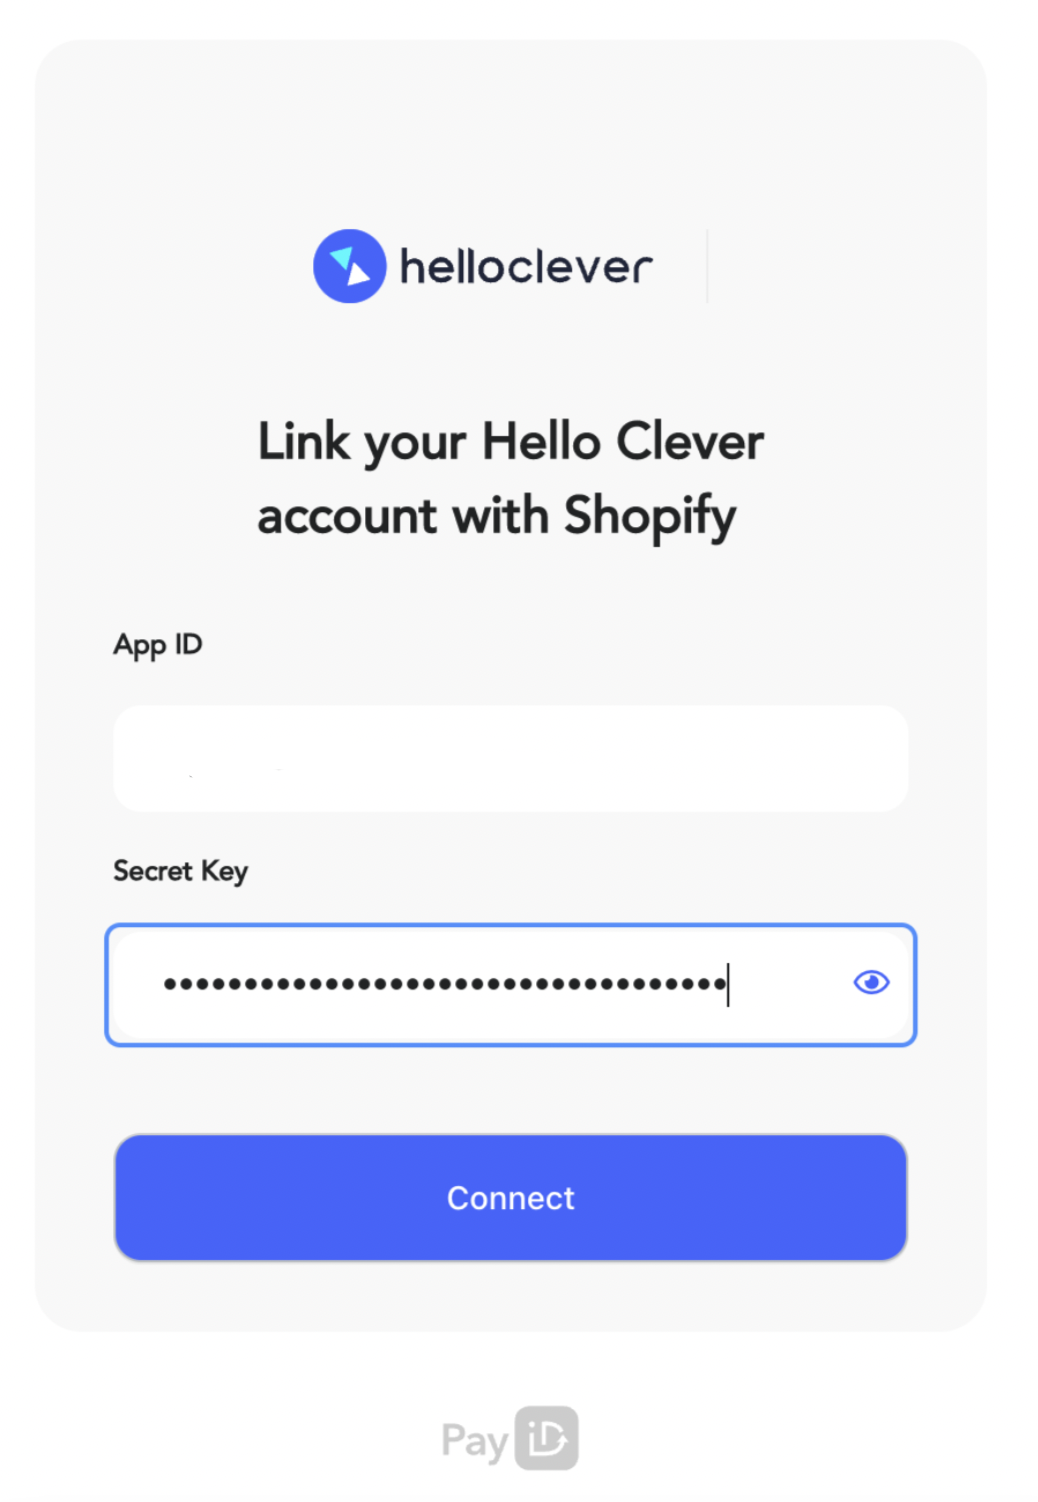
Step 2: Enter App ID and Secret Key
-
Shopify will ask you to grant Hello Clever permission to process orders and refunds. Click Install App to proceed.
-
You will be prompted to enter your App ID and Secret Key. Use the credentials generated from your Hello Clever Merchant Dashboard.
Step 3: Activate Hello Clever
-
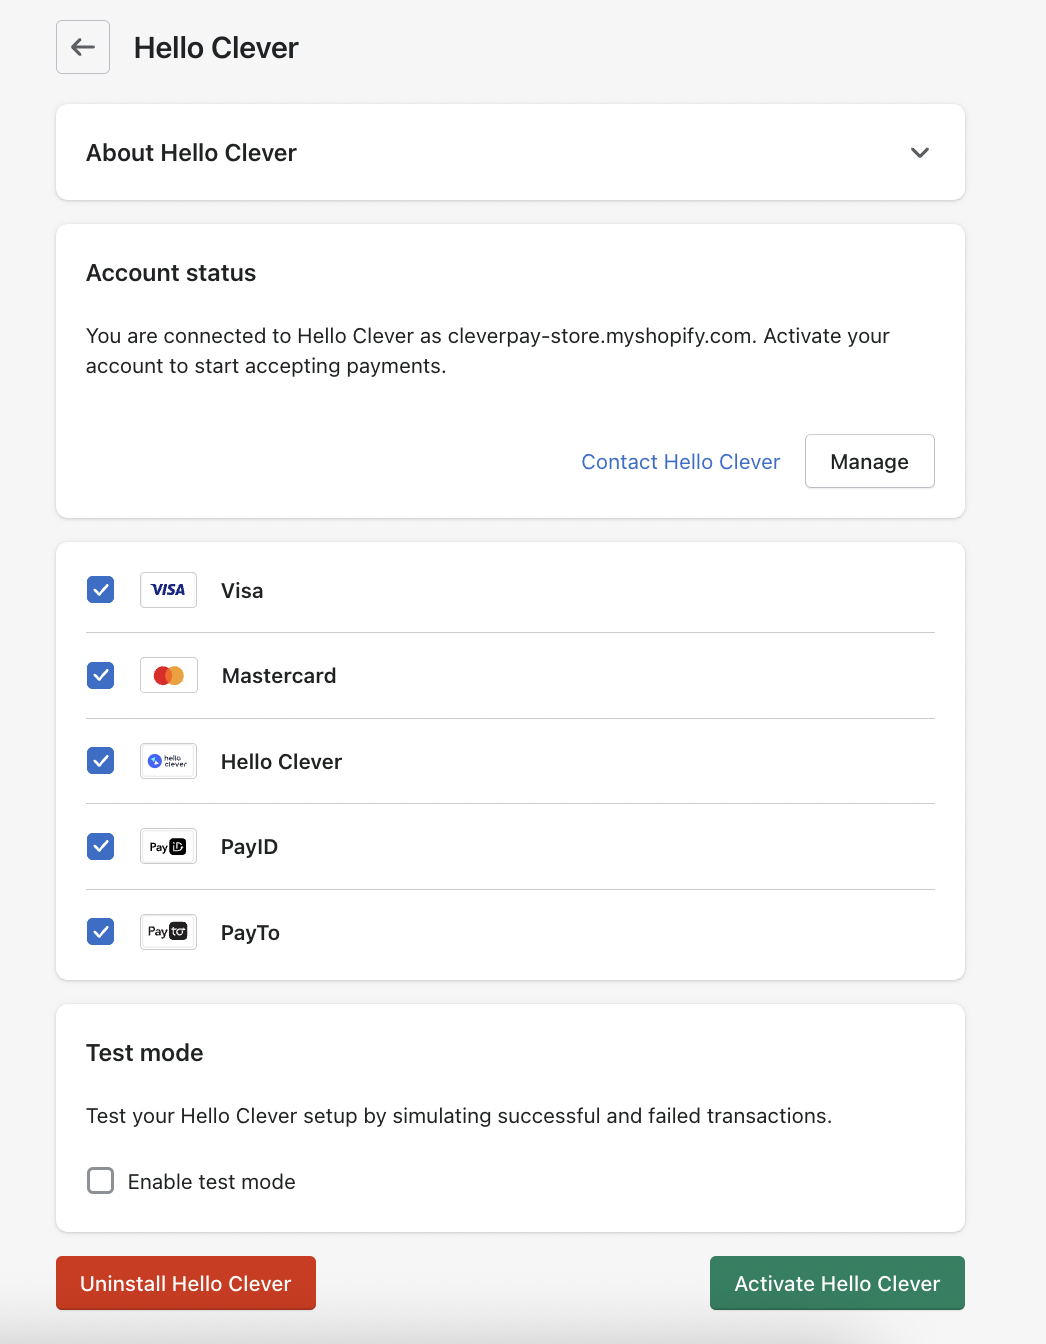
After entering the App ID and Secret Key, you will be redirected to the Shopify store configuration page.
-
(Optional) Select the payment method logos you want to display at the checkout.
-
Click on Activate Hello Clever at the bottom of the page.
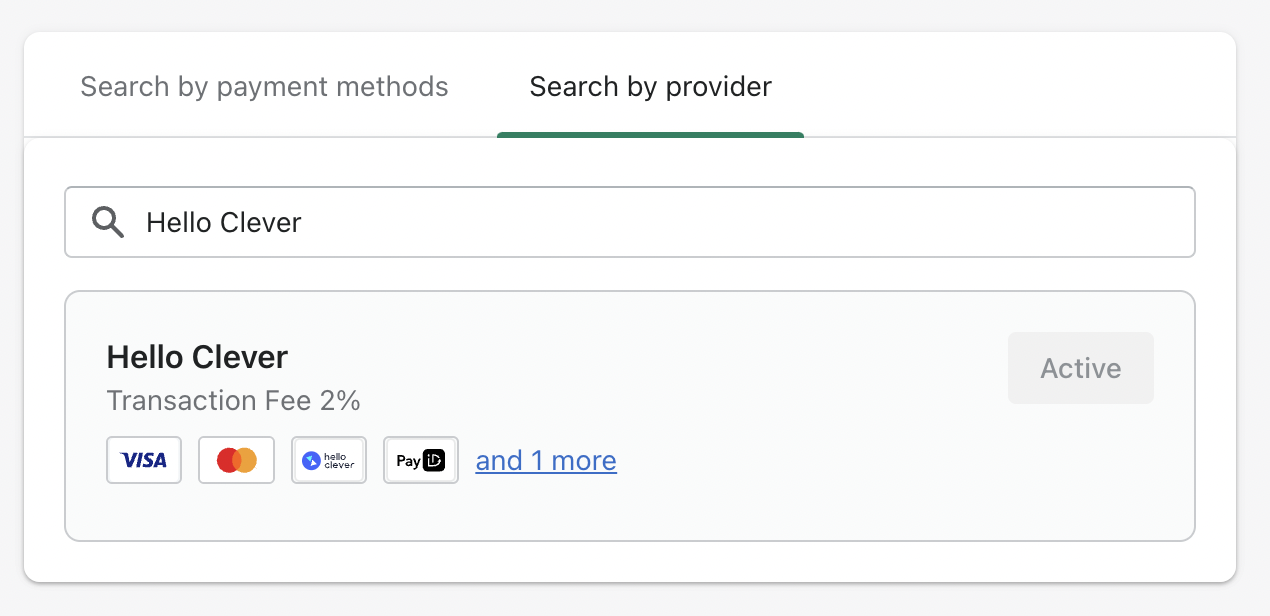
Step 4: Verify Setup
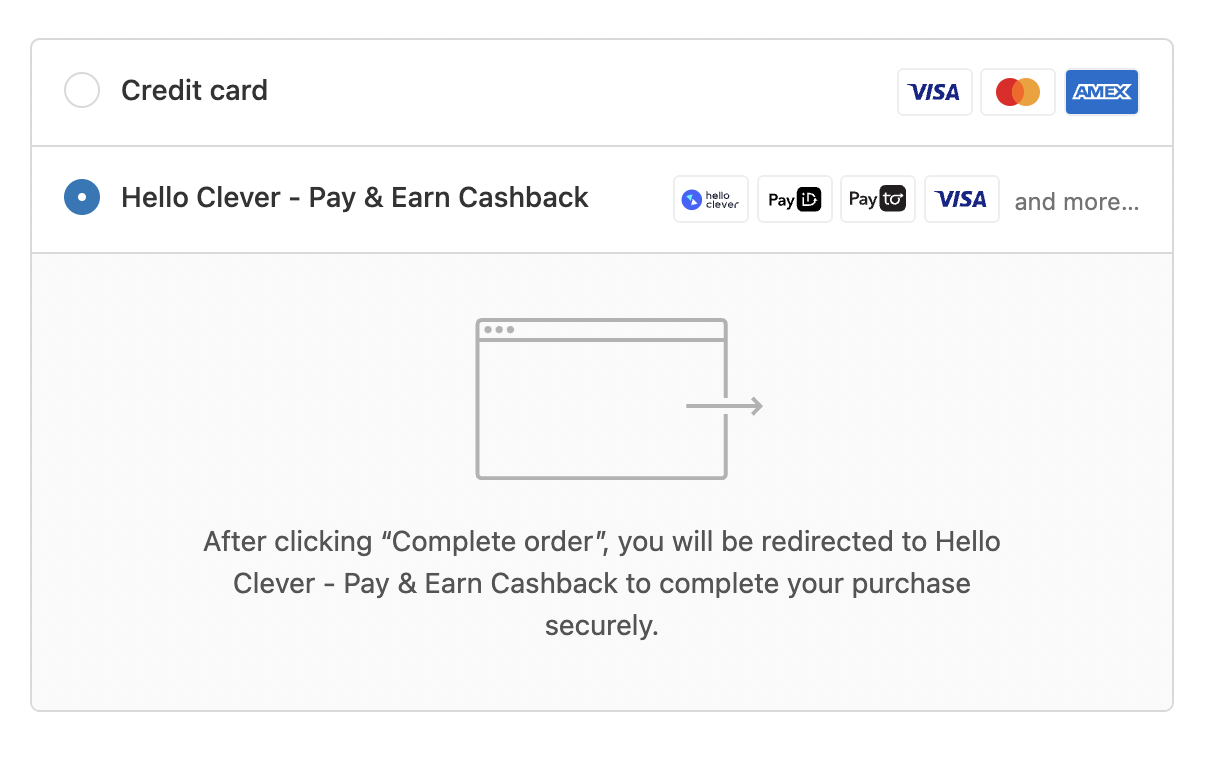
Once activated, Hello Clever will appear as a payment option on your store's checkout page. Customers will now see Hello Clever among the available payment methods.
Notes
- Each pair of App ID and Secret Key from the Hello Clever Merchant Dashboard can be used for a single Shopify store only.
- If you need to install Hello Clever on multiple stores, generate a new pair of credentials for each store.
By following this guide, your customers can now use Hello Clever as a payment method on your Shopify store.
For more information: https://docs.helloclever.co/category/shopify-2